Good morning!
For those of you who have been following my blog, you've probably read something on this subject. Well, yesterday was the day for this little DIY project.
The reason for wanting a headboard in the first place has mostly to do with the fact that the bed is bellow a window, which made it really cold in the Winter. Also, the mattress is considerably smaller than the bed frame, which created a huge gap between the frame and the mattress that my cats particularly loved, specially because it allowed them to go under the bed ans into the huge storage drawers and scratch. Preferably during the night.
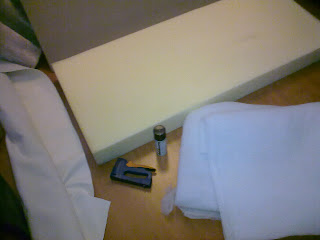
So I needed a headboard that was 60cm tall, 140cm wide and 15cm thick. For this I got a 60cmx120cmx1,5cm pvc board. I figured the lack of width wouldn't be a problem. I was wrong. I got a 60cmx140x12xm foam block and I got about 200cmx150cmx1,5cm batting. I also got some spray glue and a stapler gun. I must confess I was eager to try the stapler out. I also got 300x150cm of faux leather. I chose the most easy to work with, in white since the room is all white and light grey.
First I spray glued the foam and the board. Please be careful to do this in a ventilated area and keep all small children and pets out of that room. It should dry really fast.
Then is was time to attach the batting. What I did was laying the batting on the floor and the foam with the pvc on top. I tried pulling as hard as I could without damaging the batting.
As you can see, I missed a crease. This is very easily resolved, as you just need to tug the fabric a bit more and staple the excess fabric. You'll notice that regarding the corners I did a sort of envelope close but you wont get very good results without trimming some of the batting.
It was then time for the fabric. I decided I wanted a bit of a twist with my headboard. You can of course make it simple and straight, it will save you a lot of extra work. But I decided to make a few straight horizontal lines. I used my sewing machine for that, it was amazing to see how well it did with such a hard fabric. It didn't even hesitate. I marked the lines I wanted to fold with a pencil and then clamped it before sewing. It was the only way I thought of doing this without leaving a mark on the fabric.
This kind of pattern means you'll have to watch very closely how the fabric lays on the board, as you'll want the lines to be really straight. What I did to try and keep the fabric still was to pin on the ditch of the lines as much as I could as a way to try and make sure the fabric sit still. However, if you pull it too hard it will shift. There was a lot of cursing at this stage of the project, I must admit.
This was the semi final result. As I told you before, the pvc board was a bit smaller than the foam and the intended frame. This meant that staples did not work on the corners, which means I'm going to have to sew them. However, since I hd no more time left yesterday, I placed the frame on the bed just to give you a preview. So please, disregard the corners.
And that was pretty much it.
Edit: since I was really really unhappy with the pictures, I decided to add one during day time.


0 Great People would like to say:
Enviar um comentário